Manage Users
The Manage Users tab is where Admins create and manage every account in the portal — Suppliers, Supplier Org Admins, Designers, and other Admins. You can create users, edit their email, reset passwords, change roles, and delete accounts.
You reach this from the 👥 Manage Users tab on the Admin Dashboard.
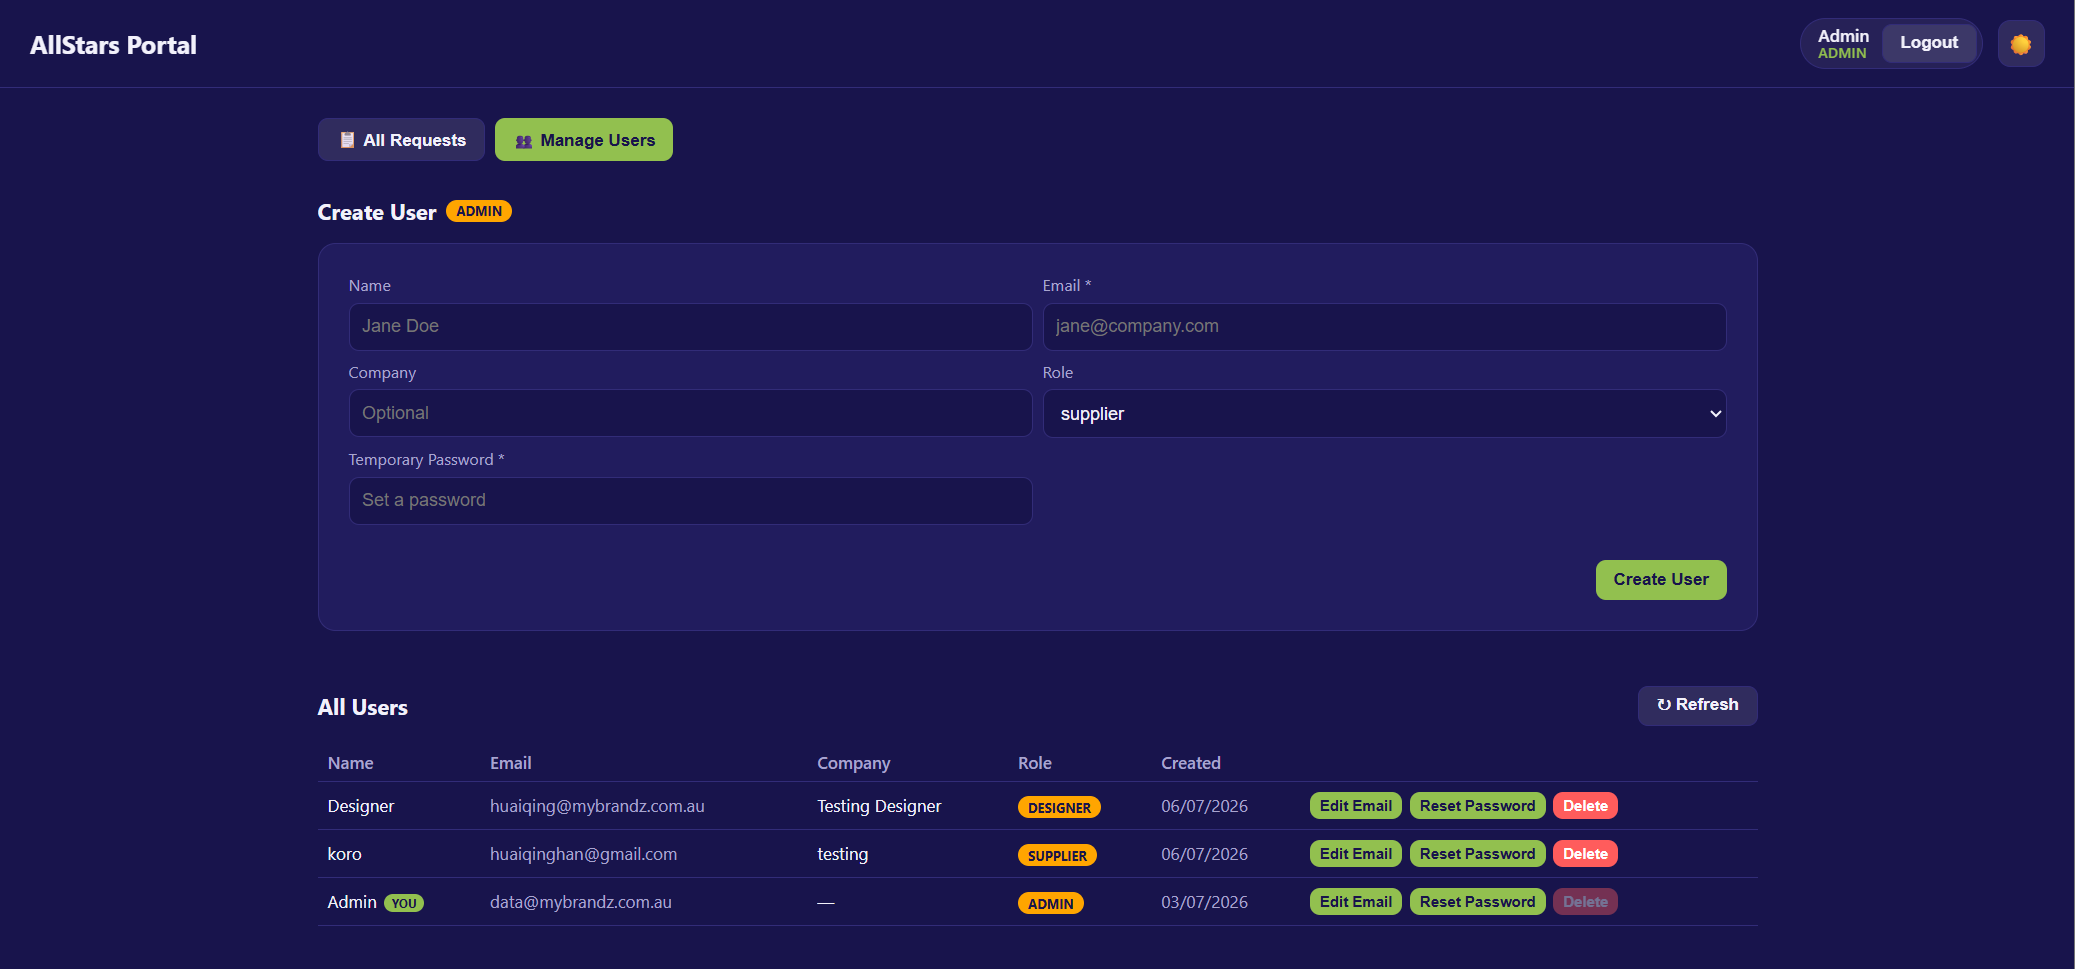
Creating a User
Fill in the Create User form at the top of the page.
| Field | Required | Description |
|---|---|---|
| Name | Optional | The user's full name, e.g. Jane Doe. |
| ✅ | The login email, e.g. jane@company.com. | |
| Company | ✅ for supplier/supplier_admin | Select an existing organisation or create a new one. |
| Role | ✅ | One of supplier, supplier_admin, designer, or admin. Defaults to supplier. |
| Temporary Password | ✅ | An initial password you set for the user. |
Selecting or Creating an Organisation
The Company field is required for supplier and supplier_admin roles.
- The dropdown lists all existing organisations — select one to assign the user to it.
- To create a brand new organisation, select ➕ Create new organisation… — the dropdown switches to a text input. Enter the new organisation name, or click ↩ to go back to the dropdown.
Warning
If you try to create a supplier or supplier_admin without selecting or entering a company, you'll see: "Please select an existing company or create a new one."
Then click Create User.
- While saving, the button shows Creating….
- On success, a green message confirms e.g. "✅ supplier_admin "jane@company.com" created", and the form resets.
Warning
Email and password are required. If either is missing you'll see "Email and password are required".
The User List
All users are shown in a table under All Users. Use ↻ Refresh to reload it.
| Column | Description |
|---|---|
| Name | The user's name (or —). Your own account is tagged You. |
| The user's login email. | |
| Company | The user's organisation (or —). |
| Role | A dropdown to view and change the user's role. |
| Created | The date the account was created. |
| Actions | Edit Email, Reset Password, and Delete. |
Changing a User's Role
The Role column is now a dropdown — you can change any user's role directly from the list.
- Click the Role dropdown on the user's row.
- Select the new role.
- A confirmation appears: "Change \<email> from "\<old role>" to "\<new role>"?"
- Confirm to apply the change immediately.
Available roles:
| Role | What it's for |
|---|---|
| supplier | Raises artwork requests and reviews/approves designs. |
| supplier_admin | Org Admin — manages a team of suppliers and their orders. |
| designer | Picks up requests and creates the artwork. |
| admin | Full portal oversight — manages requests and users. |
Warning
You cannot change your own role — the Role dropdown is disabled on the row tagged You.
Note
Some role changes have backend requirements — for example, promoting a user
to supplier_admin may require their company to be set first. If the change
is blocked, you'll see an error such as
"Set this user's company before making them an Org Admin", and the dropdown
reverts to the current role.
Managing a User
Each row has three actions:
✏️ Edit Email
- Click Edit Email to open the edit dialog.
- Enter the new email address.
- Click Save.
Note
The email must be valid (e.g. name@company.com), otherwise you'll see "Enter a valid email address".
🔑 Reset Password
- Click Reset Password to open the dialog.
- Enter a new password (minimum 4 characters).
- Click Save.
🗑 Delete
- Click Delete.
- Confirm: "Delete user "\<email>"? This cannot be undone."
Warning
You cannot delete your own account — the Delete button is disabled on the row tagged You.
The Edit Dialog
Both Edit Email and Reset Password open a dialog showing which user you're editing ("For \<name or email>").
- Enter the new value and click Save (shows Saving… while it works).
- Click Cancel or click outside the dialog to close without saving.
- Any error is shown inside the dialog.